Wiring A Bathroom Ceiling Fan
Updated date:
How to Install a Bathroom Exhaust Fan
Bert spent 25 years working as a home-improvement and residential construction contractor in central Florida.
Bert Holopaw
A properly working bathroom exhaust fan replaces old air in one room with fresh air from a neighboring room or hallway. A bathroom without proper ventilation may have foggy mirrors and unpleasant odors. An open window helps air out the room. This works fine unless the next person needs to use the bathroom in a hurry. Fortunately, many homeowners find it possible to install a bathroom exhaust fan in their home.
Before starting this project, acquire the appropriate permits and verify the local building codes and your homeowner's insurance do not require a licensed contractor for this type of task, particularly the electrical portion. Use the building codes to clarify certain requirements, such as the acceptability of a soffit discharge vent. An experienced DIY homeowner who uses common sense, works safely, and refers to the manufacturer's instructions when questions arise often completes this project within a single day without any problems at all.
Buying a Bathroom Exhaust Fan
When shopping for a new bathroom exhaust fan consider the common options available, such as light, nightlight or heater. Often the benefits of these features outweigh their expense. However, keep in mind that many of these options require additional wiring, or an electrical circuit upgrade. Most bathroom ventilation fans use a 15-amp circuit breaker and 14-gauge wiring. Due to the increased power drawn, fans with heaters usually require a 20-amp circuit breaker and 12-gauge wiring. Use the manufacturer's electrical specifications to confirm this.
Pay particular attention to the fan's cfm and sones ratings. The cfm, cubic-feet-per-minute rating measures the amount of air a fan moves and the sone rating identifies the unit's noise level. For an exhaust fan to reach these ratings, the unit must connect to a properly sized duct system. For instance, connecting a unit to a 3-inch duct when its specifications call for a 4-inch duct increases air restriction and vibration. A ventilation fan pulls air out of the room; however, a ductless fan simply circulates the air back into the room.

Planning the Exhaust Fan System's Layout
Completely laying out the system helps the installer identify any issues that may arise later. Installers who blindly cut a hole in the bathroom ceiling without laying out the system first sometimes run into trouble when they discover an unseen obstruction, such as a plumbing vent or air conditioning duct, in the way. A quick trip into the attic will locate these items beforehand.
- Identify the exhaust fan's location: Try to locate the fan housing either near the center of the room or next to a shower enclosure. Push the end of a screwdriver through the drywall in the desired location. If the drywall will not hold the screwdriver, tape it in place. The screwdriver acts as a location aid. Climb into the attic with a second screwdriver and find the first screwdriver. Check the area around the first screwdriver for obstructions. If an obstruction interferes with the chosen location, find an appropriate spot and push the second screwdriver through the bathroom ceiling.
- Plan the duct's path: Look for the most direct route from the exhaust fan toward the discharge vent. A short straight duct run helps the fan's efficiency, while a long restricted duct can impede the fan tremendously.
Cut the Hole in the Bathroom Ceiling
- Layout the fan housing: Remove the screwdriver from the bathroom ceiling. Center the fan housing over the screwdriver hole in the ceiling. Trace around the outside of the fan housing with a pencil.
- Cut the hole in the bathroom ceiling: Push a drywall saw into the hole the screwdriver made. Cut from the screwdriver hole toward the outline, and then follow the outline.
By Paul Cutler from Chaska, USA (Flickr) [CC BY 2.0 (http://creativecommons.org/licenses/by/2.0)], via Wikimedia Commons
Supply Electricity to the Fan
Turn off the circuit breaker controlling the fan's power source. Keep the circuit breaker off for the remainder of this project. Follow all electrical safety rules and when in doubt, stop and call a licensed contractor.
- Locating the exhaust fan's power supply: Compare the circuit breaker's amperage rating to the exhaust fan's electrical specifications. In many cases the existing bathroom circuit supplies enough power for an exhaust fan, or even a fan/light combination unit, without upgrading the circuit breaker and wire set. If so, use the wires feeding the existing light switch as the exhaust fan's power supply. If not, check the local building codes for permit and licensing requirements before proceeding.
- Run the wire set from the switch box to the fan unit: The wire gauge and type used depends on the amount of switches used to operate the unit. When installing a fan-only or a fan/light combination unit operating on one switch, run a 14-2 wire set. When using two switches to operate a fan/light combination unit, run a 14-3 wire set. A 14-2 wire set contains two insulated and one bare 14-gauge wire strands, while a 14-3 wire set contains three insulated and one bare wire strands. Units with a heater generally require a 12-2 for the heater option.
Cut a 6-inch square hole in the drywall about halfway between the ceiling and the switch box. Reach a hand into the hole and feel around for restrictions, such as a fire block. Feed the fan unit's wire set from the attic down through the wall and into the switch box, using the hole in the drywall for access. Push about six inches of wire into the switch box. Run the wire set toward the hole in the ceiling for the fan housing. Cut the wire set about one foot longer than needed. The extra wire makes it easier to install the housing.
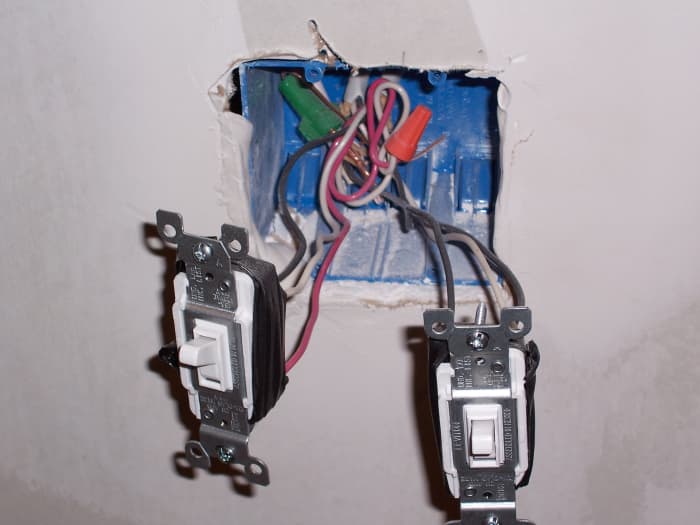
- Wire the switch: If using one switch to control the unit, connect the black wire from the circuit breaker to one switch terminal and the black wire leading to the unit to the other switch terminal. Attach both bare wires to the switch's green ground terminal. Twist the ends of both white wires together and cover them with a wire nut. Secure the switch to the switch box.
If using two or more switches to control the unit, attach a four-inch long section of insulated wire to each switch wire terminal, including the ground terminals. Combine all white wires in the switch box and cover the ends with a wire nut. Press this group of wires to the back of the switch box. Group the bare copper wires and the wire leads connected to the switch's green-colored ground terminals together and cover the ends with a wire nut. Push the ground wires against the white wire set in the switch box, leaving room in the box for the remaining black wire sets and the switches. Take one wire lead from each switch and combine it with the black wire from the circuit breaker. Twist a wire nut onto the ends of this group and force it into the switch box. Pair a black wire from the exhaust fan unit with the remaining wire lead on a switch. Twist the ends together and protect it with a wire nut. Repeat this with the remaining switches and fan function wires. Wrap a piece of electrical tape around each switch, covering the wire terminals. Mount each switch to the switch box and install the switch cover plate.
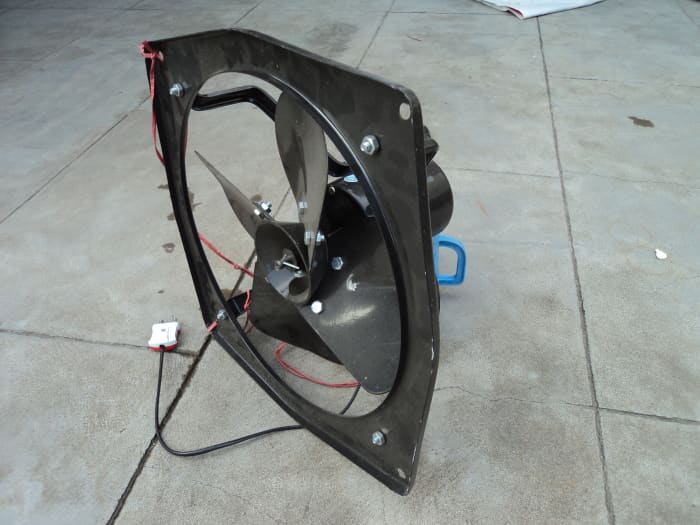
By Tha-uzhavan (Own work) [GFDL (http://www.gnu.org/copyleft/fdl.html) or CC BY-SA 3.0 (http://creativecommons.org/licenses/by-sa/3.0)], via Wikimedia
Read More From Dengarden
Prepare the Fan Housing for Installation
- Remove the fan motor and mounting bracket: The mounting bracket usually snaps into place, some units use a locking nut. If the mounting bracket snaps into place, insert a flat-head screwdriver into the space between the mounting bracket and the housing. Twist the screwdriver slightly, releasing the locking tab on the mounting bracket, and pry the bracket from the housing. If a nut holds the fan bracket in place, simply remove the nut and lift the fan bracket out of the housing.
- Open the electrical compartment: Remove the screw holding the electrical compartment's cover in place. Remove the wire knockout, a round metal disk covering the wire-access port, with a screwdriver. Install a wire clamp in the wire-access port.
- Secure the discharge port: Slip the back-draft damper into the end of the discharge port. The back-draft damper prevents wind-driven outside air from entering the bathroom. Snap the discharge port onto the exhaust fan's housing and secure it to the housing with a building-code approved foil-backed duct tape.
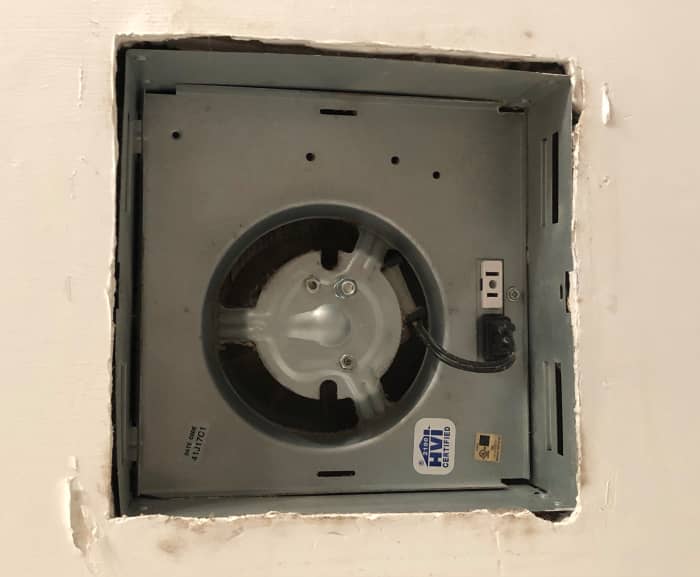
The bottom of the fan housing should rest above the bathroom ceiling's finished surface. This keeps the louver tight against the ceiling.
Bert Holopaw
Install the Exhaust Fan's Housing
- Insert wire into housing: Slide about six inches of the wire set through the housing's wire clamp and into its electrical compartment. Tighten the wire clamp.
- Mount the fan housing: Position the fan housing against the ceiling joist or bracing, keeping the bottom of the housing against the drywall's surface. The bottom of the housing must not hang below the drywall. Run a screw or nail through the holes on the housing's mounting tabs.
- Wire the fan housing: Strip about 1/2 inch of the insulation from each wire. Wrap all bare copper ground wires around the green-colored screw. Twist the black wire from the fan switch and the wire lead labeled "fan" together and cover them with a wire nut. Do this again to the white wire from the fan wire set and the white "fan" lead. Repeat this step for each switched accessory. If one switch controls all fan functions, twist all labeled wire leads around the switch's black wire and all white leads against the white wire, then protect each wire set with a wire nut. Fold all wire sets into the electrical compartment. Replace the compartment's cover.
Mount the Discharge Vent
Because some local building codes allow a soffit discharge, while others only permit roof and/or gable penetrations, the planning of the duct system starts at the discharge vent. Ideally the discharge vent lets the duct run in a straight line with a slight uphill slope from the fan to the louver. Each bend in the duct increases air flow resistance and reduces fan efficiency.
Northern climates should consider ice-dam possibilities before using a roof-mounted vent. Ice dams sometimes occur when warm air moving through the ventilation system melts snow that collected above a roof-mounted discharge vent. When the bathroom exhaust fan turns off, sub-freezing exterior air freezes the melted snow. The resulting ice gathers under the shingles nearest the vent, eventually causing an ice dam.
- Layout the discharge vent's location: Trace the outline of the discharge vent's intake port on the mounting surface. When using a roof-or gable-mounted vent, trace the outline on the roof or gable from the attic side. This prevents accidentally cutting a roof truss or support beam. Space a soffit vent between a set of trusses.
- Cut the hole for the discharge vent: Cut around the opening's outline with the appropriate tool. Consider using a reciprocating saw when cutting through a wooden roof deck or gable siding and aviation snips when working with aluminum soffit material.
- Attach the discharge vent: Apply a bead of the appropriate sealant around the discharge vent's flange. Use roof sealant on roof-mounted vents and exterior-grade caulk on gable- and soffit-mounted vents. Secure the louver to the building with either screws or nails.
Connect the Duct
Many technicians prefer to use flexible aluminum duct on a bathroom ventilation system. This lightweight type of duct bends easily and cuts with a non-serrated knife. Choose the duct size, usually 3- or 4-inches wide, that matches the fan's discharge port.
- Prepare the duct: Stretch flexible aluminum duct to its full length.
- Install the duct: Place the duct's male end, the crimped end, into the discharge vent's intake port. Run the duct from the discharge port toward the fan housing. Insert the male end on each additional piece into the previous piece's female end. Cut the last piece to length with a non-serrated knife. Slide the cut end over the fan's discharge port.
- Secure the duct: Hold the duct in place with either a duct strap or hanging material. Place the first strap within two feet of the discharge vent and place an additional hanger every four feet. Use additional hanging material to lift any bellies in the duct, preventing excessive moisture from collecting in the low areas.
- Seal all duct connections: Wrap a section of foil-backed duct tape, the same tape used to secure the discharge port, around each duct connection. Press the tape against the duct with either a squeegee or spoon. This type of tape withstands heat and holds its shape better than cloth- or fiber-backed duct tape.
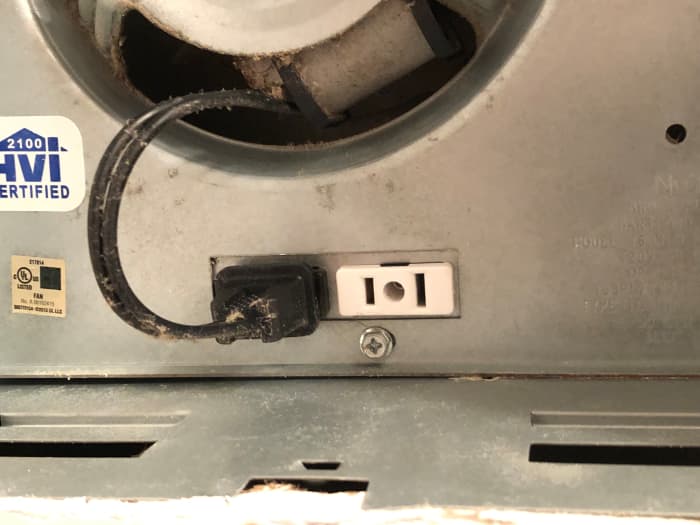
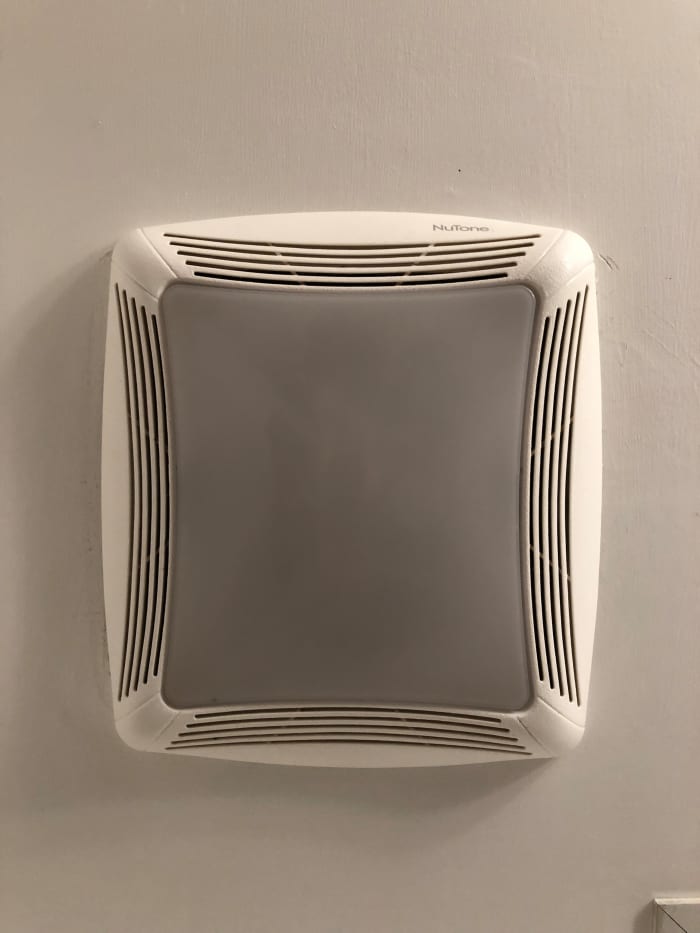
This unit's fan motor plugs into one electrical receptacle and its light plugs into the other.
Bert Holopaw
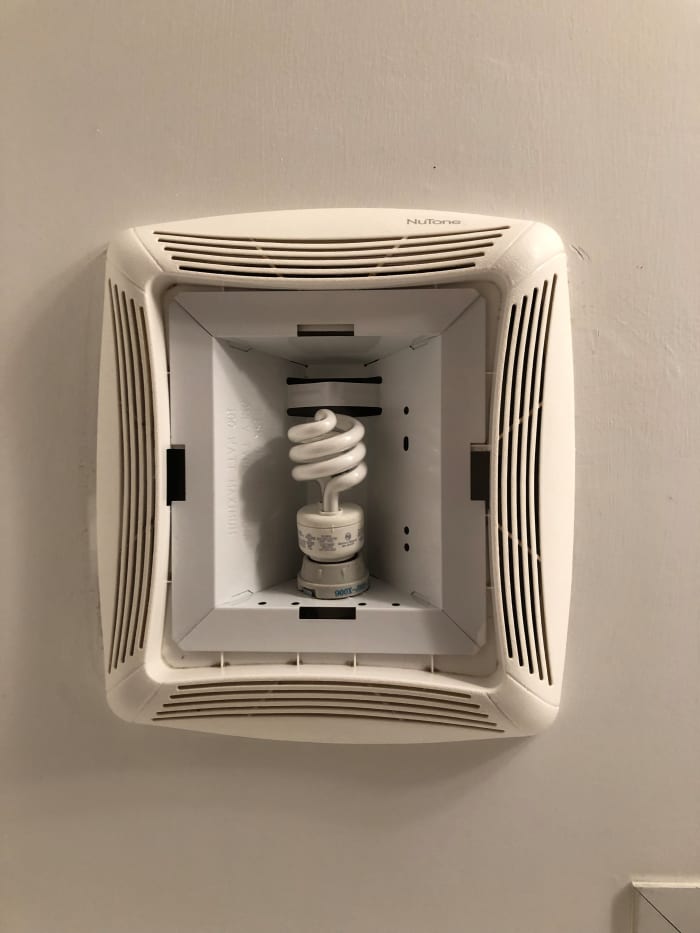
Pay attention to the manufacturer's assembly instructions. Tightening a nut on this unit's metal light bulb fixture forces the plastic fan louver tight against the ceiling and the light cover snaps into the rectangular slots next to the louver.
Bert Holopaw
Assemble and Test the Bathroom Exhaust Fan
- Assemble the fan: Hold the fan motor against the housing and either snap it into place or tighten the housing's locking nut. Apply metal-backed duct tape to the seam between the fan motor and the fan housing. This extra step prevents rattling, a common issue when snap-in fan motors do not fit tightly into the housing.
- Connect the power: Insert each of the fan's plugs into their appropriate socket. Each accessory uses its own plug and socket, even when an exhaust fan with accessories uses one switch.
- Install the fan louver: Squeeze one spring clip and insert it into the slot on the side of the fan housing. Release the spring clip. Repeat this with the second spring clip. Push up on the bottom of the louver, forcing the spring clips up into the fan housing, until the clips hold the louver against the ceiling.
- Test the fan: Turn on the fan and all applicable accessories. Everything should turn on without tripping the bathroom circuit breaker or GFCI. Many people test the fan's effectiveness with a candle. Light the candle and blow it out. Hold the candle about six inches away from the fan's louver and watch the stream of smoke enter the fan. The fan should pull all of the smoke out of the room.
This article is accurate and true to the best of the author's knowledge. Content is for informational or entertainment purposes only and does not substitute for personal counsel or professional advice in business, financial, legal, or technical matters.
© 2017 Bert Holopaw
Related Articles
Source: https://dengarden.com/home-improvement/How-to-Install-a-Bathroom-Exhaust-Fan-in-a-Room-Without-One

Komentar :
Posting Komentar